
If you have several items in a directory, you can use categories to organize them.
For example, if you have different items related to in-room information, you can group them under the same category so it’s easier for guests to find this information.
Here’s how:
Access the CMS and go to Content > Facilities > Directory.
Here you will see the items you have already created.
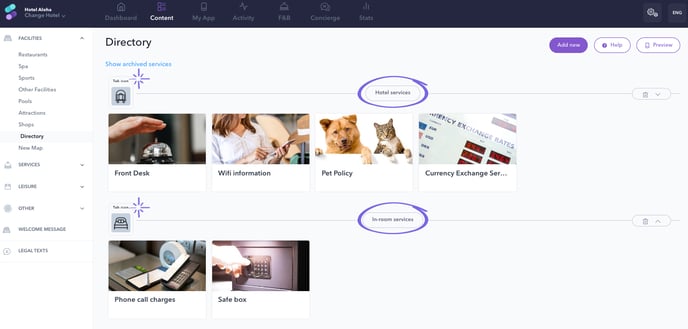
By clicking on Add category, you can type a name to identify a group of services. Click on the arrow next to it to save changes. You can create another category for a different group if necessary.
You can also choose an icon for each category so guests can easily identify it when accessing it from the app.
You can access the different categories and existing items just by clicking on Directory on the left menu of the Content section of the CMS.
You can edit a category name by clicking on it and just typing. Do not forget to click on the arrow next to it to save it.
You can delete a category by clicking on the trash icon. By deleting a category, you are not removing the items included in it. They would keep existing but without having an assigned category.
And you can change a category’s position on the list by clicking on the arrow next to the trash icon (up or down).
If you need to move a certain item to another category, you can hover the mouse over the item and click on Move. The list of existing categories will appear so you can choose the one you need to move it to.